
My First Use Case with Salesforce and Copado Robotic Testing

By Ville-Matti Riihikoski
Test one small Salesforce change with Copado Robotic Testing (CRT) and the Agentia CLI. Click through the change in a live cloud browser, save the steps as a test, run it, and break the feature on purpose to see the test catch it.
You deploy a change to your Salesforce org. The terminal says Succeeded.
That tells you the metadata arrived. It doesn't tell you the feature works. Usually you open the org, click through one record, and move on. Then two sprints later someone edits a validation rule and nobody notices.
A robotic test fixes this. It does the same clicks every time, so it catches the change nobody noticed. Here is my first use case, start to finish.
The use case
Our sales managers want to mark accounts as Bronze, Silver, or Gold. One rule applies: a Gold account needs an Annual Revenue of at least 1,000,000.
We added a Customer Tier picklist to Account and this validation rule:
AND(
    ISPICKVAL(Customer_Tier__c, "Gold"),
    OR(ISBLANK(AnnualRevenue), AnnualRevenue < 1000000)
)
That gives us three behaviors to test:
- A Gold account with revenue below 1,000,000 is rejected with an error.
- A Gold account with revenue of exactly 1,000,000 saves.
- A Silver account saves with any revenue.
What you need
- Agentia CLI signed in to CRT (
agentia auth get --crt). - A Salesforce org with the change deployed (we use a scratch org).
- A CRT project and robot that can log in to that org.
Our robot logs in with the Salesforce OAuth 2.0 JWT bearer flow, so there's no password or MFA code to deal with. The login values live in CRT project variables, so secrets never show up in test files or terminal history. This video tutorial walks through the setup.
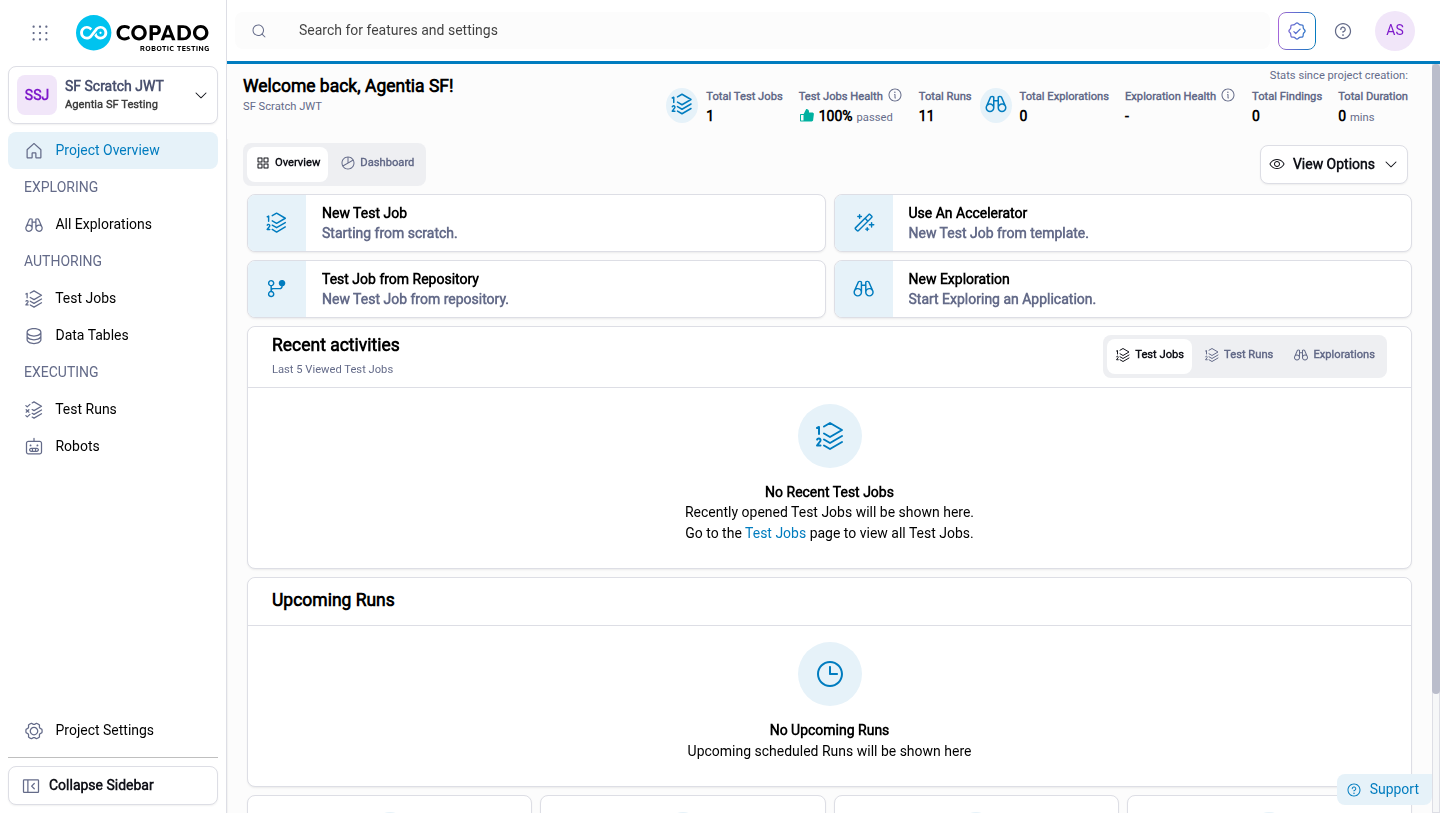
The SF Scratch JWT project in Copado Robotic Testing
Step 1: Click through the change in a live browser
agentia testing browser starts a CRT browser in the cloud. You give it your CRT project ID (<project-id>), a job ID (<browser-job-id>) that supplies the robot and login variables, and --library QForce for the Salesforce Lightning keywords.
The examples below use placeholders in place of project, job, robot and run IDs. Replace them with your own values.
Then you send one Robot Framework keyword at a time and check the result after each:
agentia testing browser start <browser-job-id> --project <project-id> --library QForce --json
{ "result": { "jobId": "<browser-job-id>", "projectId": "<project-id>", "sessionId": "<session-id>", "status": "ready" } }
agentia testing browser execute --project <project-id> --json \
  --line 'JwtAuthenticate  ${jwt_client_id}  ${username}  ${private_key}  custom_url=${login_url}' \
  --line 'JwtLogin' \
  --line 'VerifyTitle  Home | Salesforce'

agentia testing browser execute --project <project-id> --json \
  --line 'LaunchApp  Sales' \
  --line 'ClickText  Accounts' \
  --line 'ClickText  New  anchor=Import' \
  --line 'UseModal  On'

agentia testing browser execute --project <project-id> --json \
  --line 'TypeText  Account Name  Northwind Traders' \
  --line 'PickList  Customer Tier  Gold' \
  --line 'TypeText  Annual Revenue  250000'

agentia testing browser execute --project <project-id> --json \
  --line 'ClickText  Save  partial_match=False' \
  --line 'VerifyText  Gold tier needs an Annual Revenue of at least 1,000,000.'

agentia testing browser screenshot --project <project-id> --output explore-error.png
Each successful execute command returns a completed status:
{ "result": { "sessionId": "<session-id>", "status": "completed" } }
We open the New Account form and fill in a Gold account with 250000 revenue. agentia testing browser screenshot shows what the robot sees:
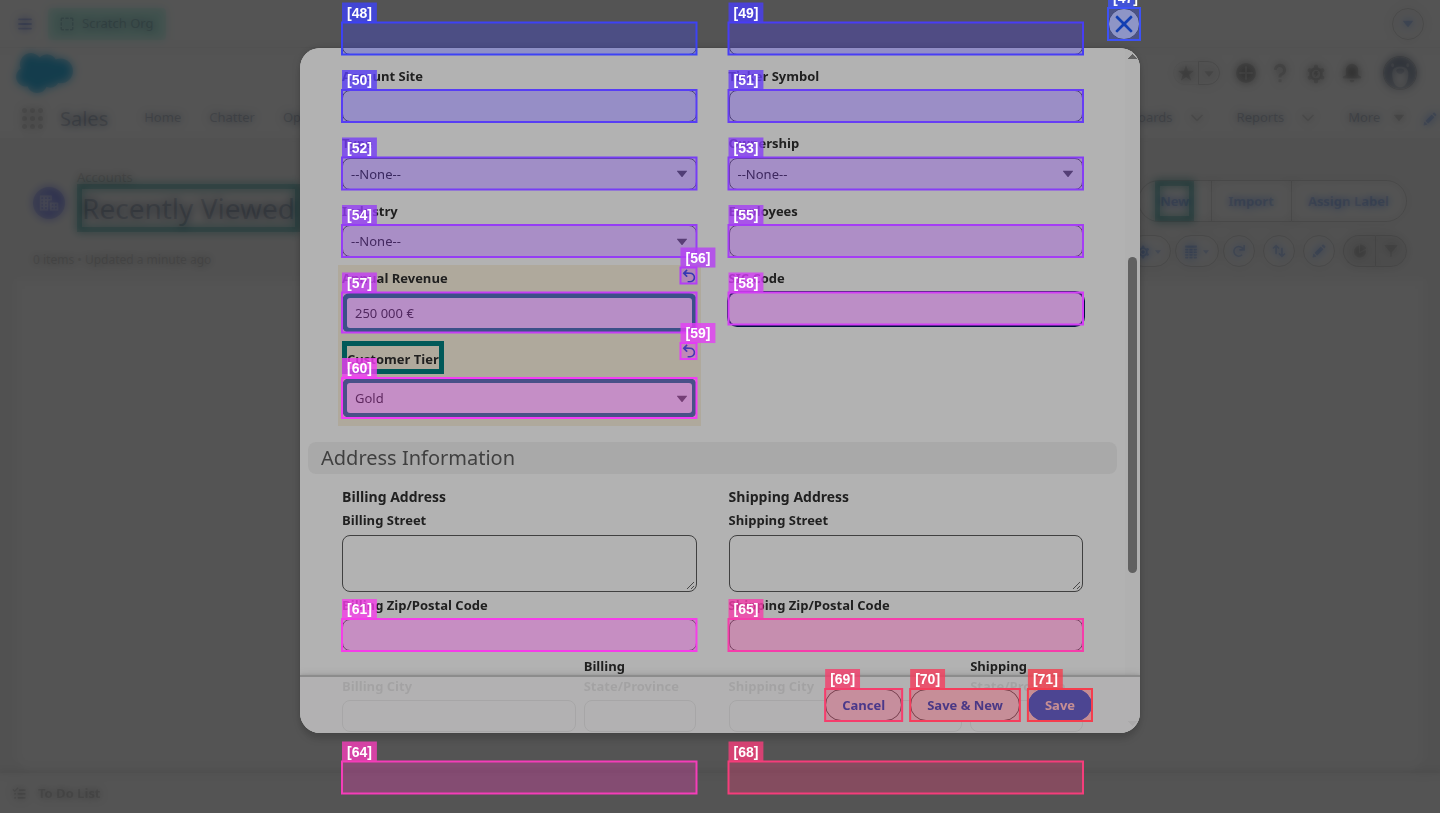
The New Account form filled in with Gold tier and low revenue
We click Save, and the validation rule blocks it:
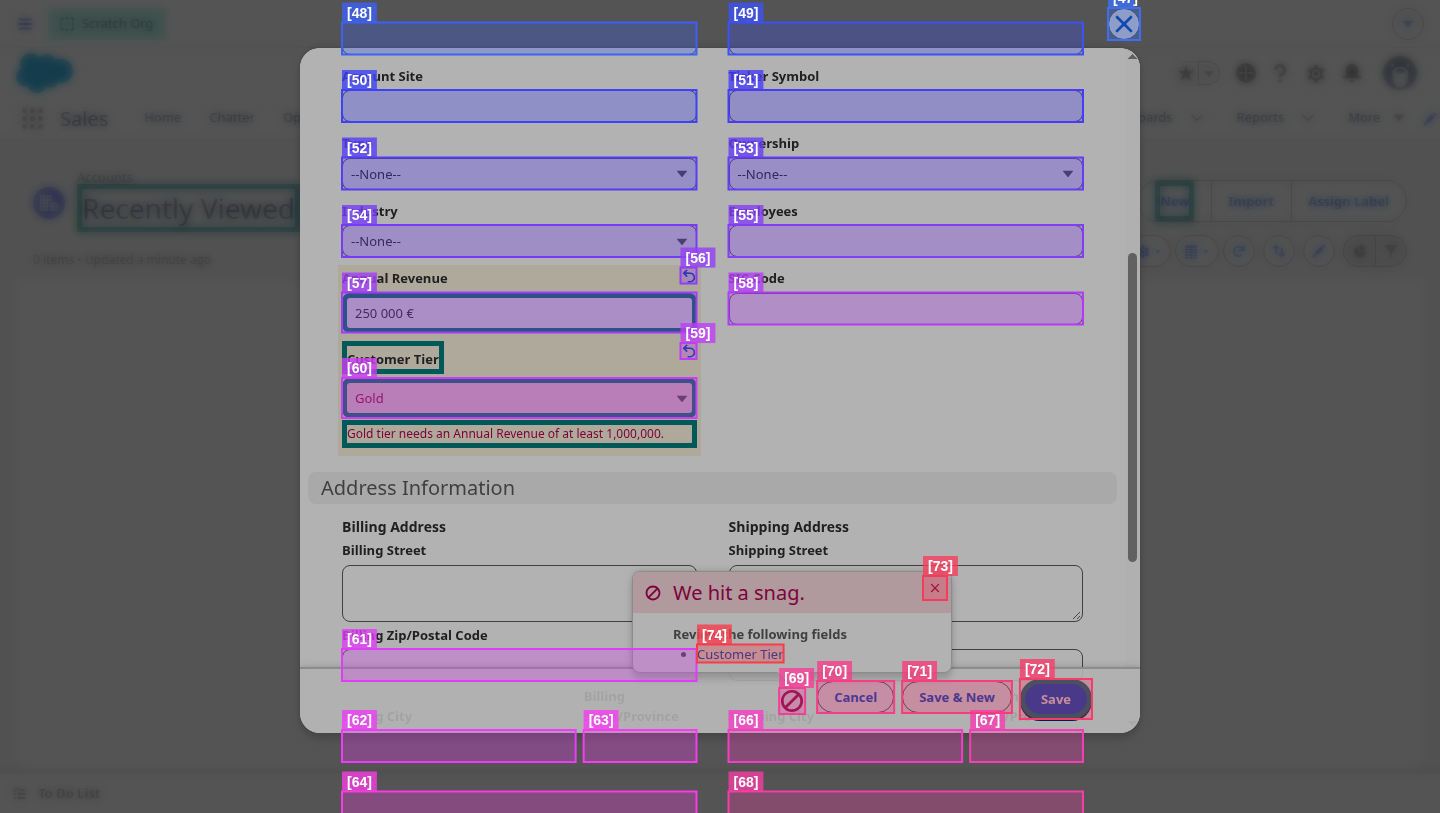
The validation rule error shown on the Customer Tier field
We change the revenue to 2000000 and save again. This time the record saves, and VerifyField Customer Tier Gold confirms the value:
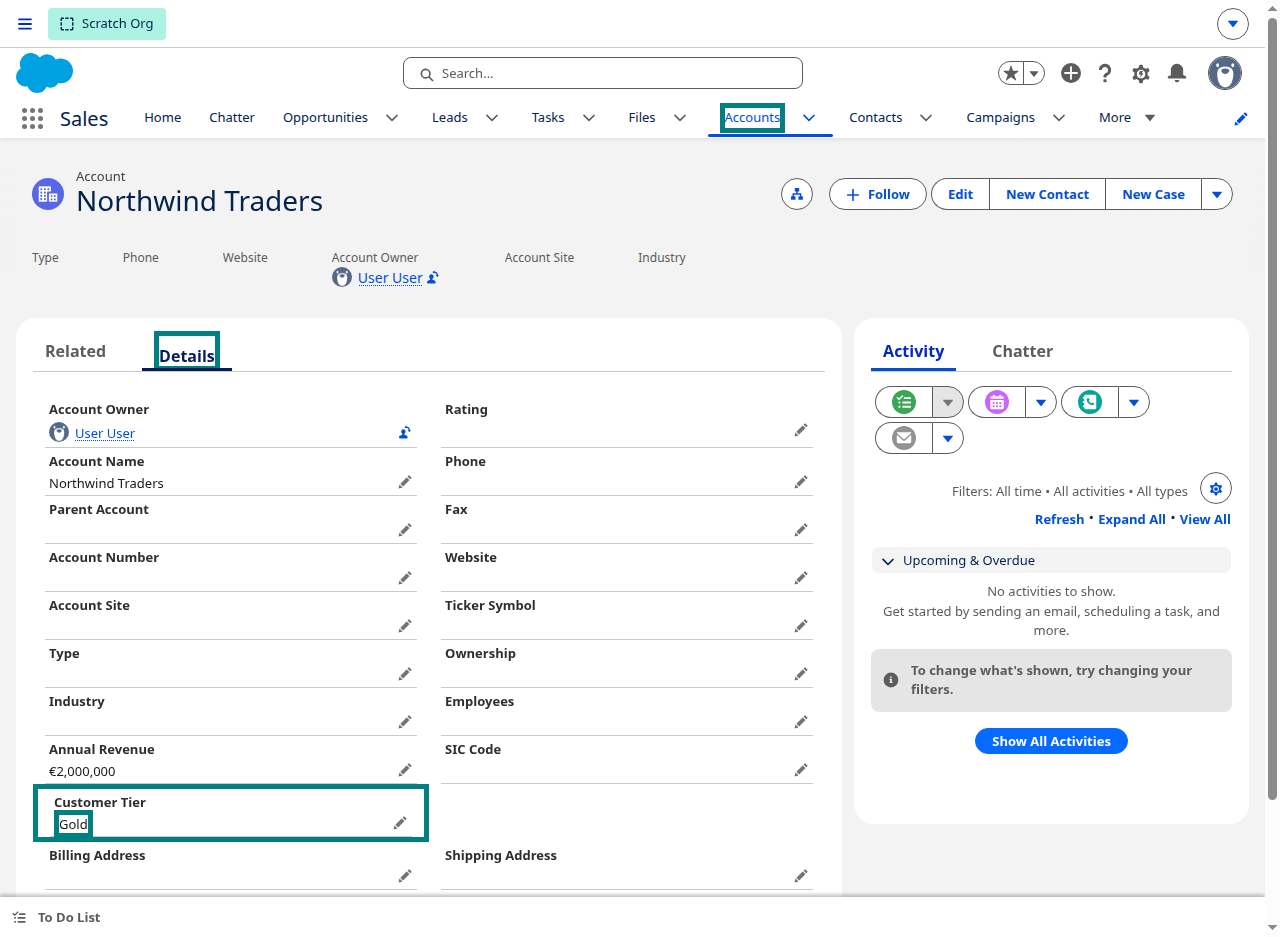
The saved Gold account, with the verified Customer Tier field highlighted
CRT keeps a history of every keyword that worked. Export it to a file and stop the browser:
agentia testing browser history <browser-job-id> --project <project-id> --limit 50 --lines-only > flow.robot
agentia testing browser stop --project <project-id> --yes
flow.robot is now the first draft of your test.
Tip: Going one keyword at a time is much faster than writing a whole script and debugging it through full runs.
Step 2: Turn the steps into a test
We cleaned up the exported keywords and put them in two small helpers, Open New Account Form and Fill Account, in resources/common.robot. Then we wrote one test case for each behavior:
*** Settings ***
Resource                  ../resources/common.robot
Suite Setup               Setup Browser
Suite Teardown            End Suite

*** Test Cases ***
Gold Account Below Revenue Threshold Is Rejected
    Appstate              Home
    Open New Account Form
    Fill Account          ${run_tag} Gold Low         Gold                   250000
    ClickText             Save                        partial_match=False
    VerifyText            ${tier_error}
    LogScreenshot
    ClickText             Cancel
    UseModal              Off

Gold Account At Revenue Threshold Is Saved
    Appstate              Home
    Open New Account Form
    Fill Account          ${run_tag} Gold             Gold                   1000000
    ClickText             Save                        partial_match=False
    UseModal              Off
    ClickText             Details
    VerifyField           Customer Tier               Gold

Silver Account Has No Revenue Requirement
    Appstate              Home
    Open New Account Form
    Fill Account          ${run_tag} Silver           Silver                 5000
    ClickText             Save                        partial_match=False
    UseModal              Off
    ClickText             Details
    VerifyField           Customer Tier               Silver
What we learned while writing it:
- Test the exact boundary. In the browser we used
2000000, which would also pass if the rule said<=instead of<. Only1000000checks the real limit. - Use
VerifyFieldon saved records. Lightning shows the same labels in more than one place, soVerifyTextcan pass for the wrong reason. - Use
partial_match=Falseon Save. Without it,ClickText Savecan click Save & New. - Clean up after yourself.
Suite Setupcreates a random${run_tag}for the record names, andSuite Teardowndeletes those accounts through the API. Runs don't leave data behind.
Step 3: Run it
Upload the folder to create a CRT test job:
agentia testing job create -p <project-id> --robot <robot-id> \
  --name "Customer Tier Regression" \
  --description "Verifies the Customer Tier field and the Gold tier revenue rule on Account" \
  --dir crt/customer-tier --base-path crt/customer-tier --json
{
  "result": {
    "filesUploaded": 2,
    "jobId": "<test-job-id>",
    "projectId": "<project-id>",
    "job": {
      "id": "<test-job-id>",
      "name": "Customer Tier Regression",
      "robotId": "<robot-id>",
      "suiteType": "default"
    }
  }
}
Then run it:
agentia testing job run <test-job-id> -p <project-id>
The command streams the output and exits with a non-zero code if a test fails, so it works in scripts and CI too.
Run ID: <run-id>

Customer Tier Regression
Gold Account Below Revenue Threshold Is Rejected          | PASS |
Gold Account At Revenue Threshold Is Saved                | PASS |
Silver Account Has No Revenue Requirement                 | PASS |

3 tests, 3 passed, 0 failed
Testing run finished
buildId: <run-id>
jobId: <test-job-id>
projectId: <project-id>
All three tests pass through the real Lightning UI.
Step 4: Break it on purpose
You can't fully trust a test until you've seen it fail. So we deactivate the validation rule (<active>false</active>), redeploy, and run the same job:
agentia testing job run <test-job-id> -p <project-id>
Customer Tier Regression
Gold Account Below Revenue Threshold Is Rejected          | FAIL |
QWebElementNotFoundError: Unable to find element for locator
Gold tier needs an Annual Revenue of at least 1,000,000. in 45.0 sec

[ WARN ] Could not find text using "web" recognition
[ WARN ] You could try using computer vision engine:
[ WARN ] VerifyText Gold tier needs an Annual Revenue of at least 1,000,000. recognition_mode=vision

Gold Account At Revenue Threshold Is Saved                | PASS |
Silver Account Has No Revenue Requirement                 | PASS |

3 tests, 2 passed, 1 failed
Testing run finished
Error: Testing run finished with status failed.
The suite fails after the validation rule is deactivated
The negative test fails and the other two still pass, which is what we wanted. CRT saves a screenshot at the failing step, showing that the invalid Gold account was saved:
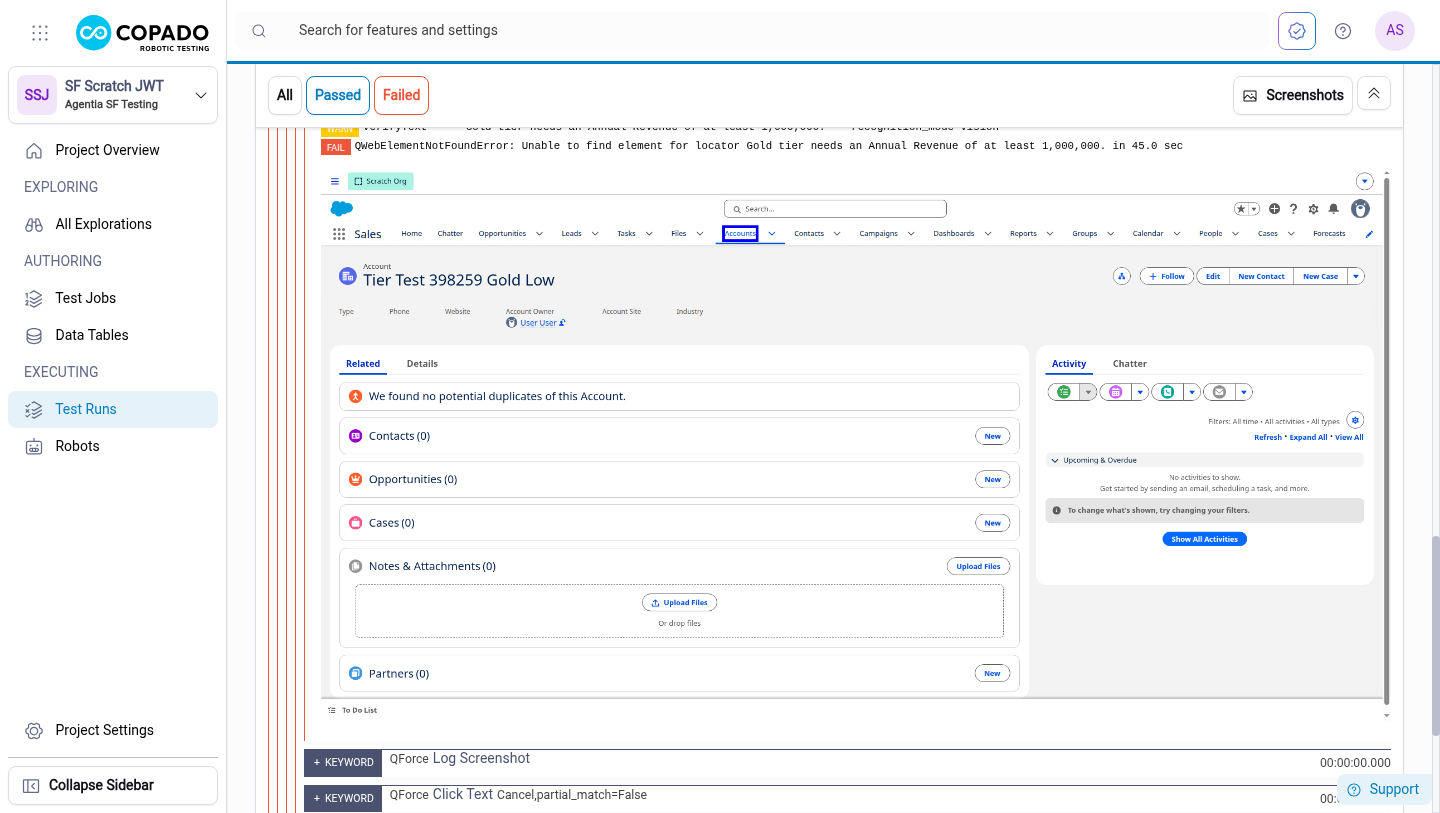
The failure screenshot in the CRT log shows the invalid account was saved
Turn the rule back on, redeploy, and the suite passes again. The test does what we built it for.
What's next
Once the test works, attach it to your Copado User Story as a Robotic Test deployment step. Then it runs again in every environment the change goes to:
agentia cicd work deployment-step create \
  --name "Customer Tier regression" \
  --type "Robotic Test" \
  --crt-test-id <copado-test-record-id> \
  --crt-run-on destination
The takeaway
A deployment tells you the metadata arrived. A robotic test tells you the feature works.
Start small: pick one rule, click through it once in the live browser, save the steps, and break it on purpose. That's your first Robotic Test.